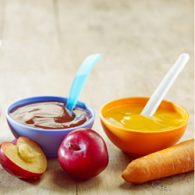
Top reasons for making your own baby food:
Baby food doesn’t have to come in jars. Making your own baby food at home is not difficult. Baby food is simply strained, pureed, or mashed adult food, just a different version of the food you prepare for yourself. Three good reasons for making your own baby food are:
- You know what’s in it
- You can custom-tailor the texture to your baby’s taste preferences
- You can shape your baby’s tastes and help her learn what fresh foods taste like.
Tips for making your own baby food
- Buy organic fruits and vegetables. Your baby deserves pesticide-free foods. Scrub fruits and vegetables extra well with a vegetable brush. Trim stringy parts and remove any part of the food that could cause choking, such as pits, peels, and seeds. Trim excess fat off poultry and meat.
- Steam vegetables. This softens them, makes them easier to chew, and preserves more of the vitamins and minerals than boiling.
- No need to add salt or sugar. Try a bit of lemon juice as both a preservative and a natural flavor enhancer.
- Avoid deep-frying, which adds unhealthy fats to foods.
- Don’t feel you have to prepare separate meals for your baby. You can simply take portions of your adult food (before you add any strong seasonings) and grind or mash to a stage appropriate for your baby.
- Make enough for several meals at a time and pour the freshly-cooked and pureed food into an ice cube tray. Cover with cellophane wrap and freeze. Then, remove the frozen food cubes from the tray and store in air-tight freezer bags. Remove one serving-size cube at a time when needed.
- When baby graduates from cube-size portions, store the homemade food in recycled commercial baby food jars or small, plastic, freezer containers. Be sure not to fill the jars to the brim, as food expands as it freezes.
- Label all your freezer packages with contents and date and rotate stock like the supermarket does – putting the most recently frozen foods behind the previously frozen ones. Homemade baby foods can be safely kept frozen for three months.
- For slow thawing, place a day’s worth of baby food in the refrigerator. It will thaw in about four hours. For fast thawing, use an electric warming dish or place a heat-safe dish over water in a small saucepan and heat gently.
- If you use a microwave to thaw or warm baby food, be sure to stir the food well to avoid hot pockets.
- No matter what method of heating and thawing you use, stir the food well and test it with your finger to be sure it’s not too hot.
- To avoid wasting your carefully prepared cuisine, dole out small portions. Gradually add more, using a clean spoon as needed. (See Shaping Young Tastes)
Suggested Supplies to Use when Making Your Own Baby Food:
- Food processor and/or blender
- Fork and potato masher
- Food mill
- Fine-meshed strainer
- Hand-cranked baby-food grinder
- Vegetable brush and peeler
- Roasting pan
- Measuring cups and spoons
- Vegetable steamer
- Sharp paring knife
- Egg poacher
- Ladle
- Saucepan with lid
- Spatula
- Cutting board
- Grater
- Ovenproof glass cups
- Colander
Suggested Supplies for Storing and Freezing Baby Food
- Ice-cube tray
- Storage jars (4 ounce/120-milliliter)
- Small freezer bags
- Cookie sheet
- Waxed paper
- Freezer tape
- Marking pen
- Muffin tin

